CSS Cursors
You can control what the cursor looks like when you mouse over HTML elements. You can even create and use custom cursors.
Important Things to Know
- How to change cursors
- How to create a custom cursor image using Photoshop
CSS Properties
| Property | Values | Description |
|---|---|---|
| cursor | all possible values | This property sets the cursor. |
cursor Back to top
The cursor property sets the cursor when you hover over an HTML element.
In this example, we are using built-in cursors.
Here is a list of all possible values.
h1 {
  cursor: crosshair;
}
p {
  cursor: pointer;
}
In this example, we are using cursor images that we created.
Notic that you need to have , auto added to the end.
* {
  cursor: url("img/cursors/hands/mickey-mouse-glove.png"), auto;
}
h1 {
  cursor: url("img/cursors/disney/mickey-mouse-01.png"), auto;
}
p {
  cursor: url("img/cursors/ghostbusters/ghostbusters-logo-01.png"), auto;
}
Create Cursor Images with Photoshop
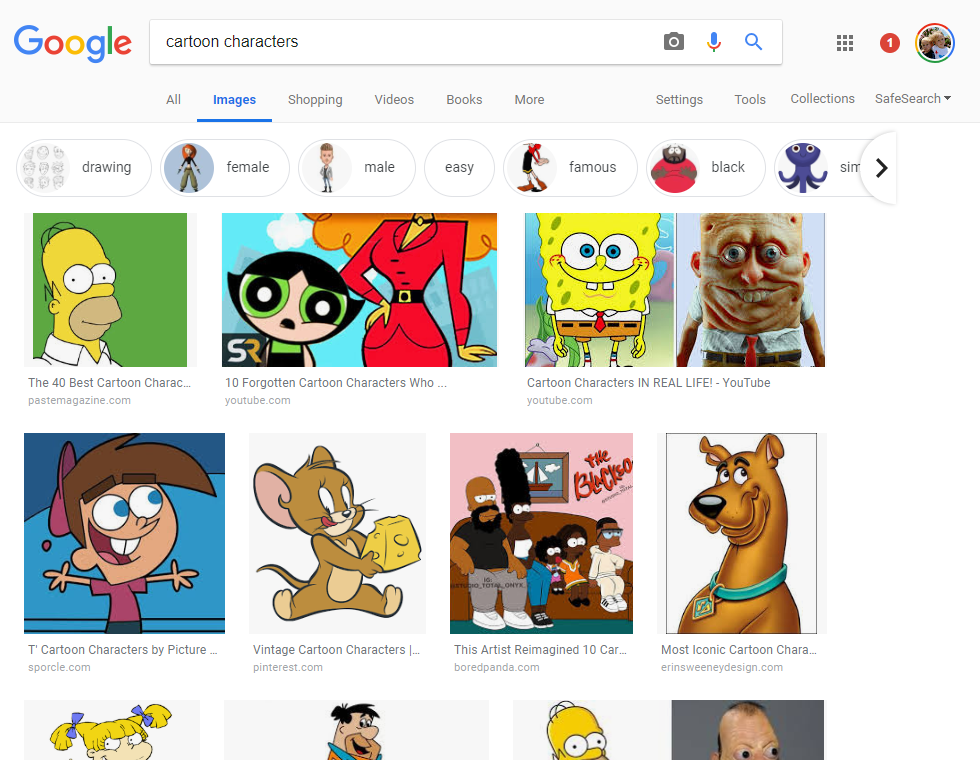
Search for an image
Use Google Image Search to look for an image you want to use for a cursor.
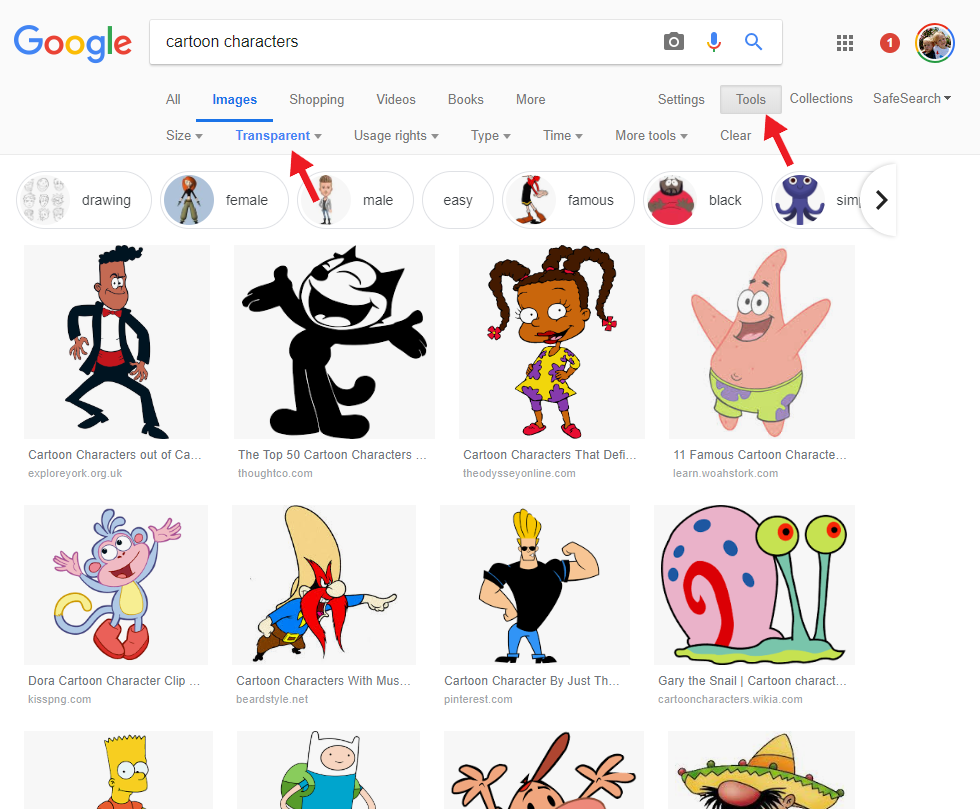
Only look for transparent images
You only want to look for images with a transparent background.
- Click on Tools
- Change color to transparent
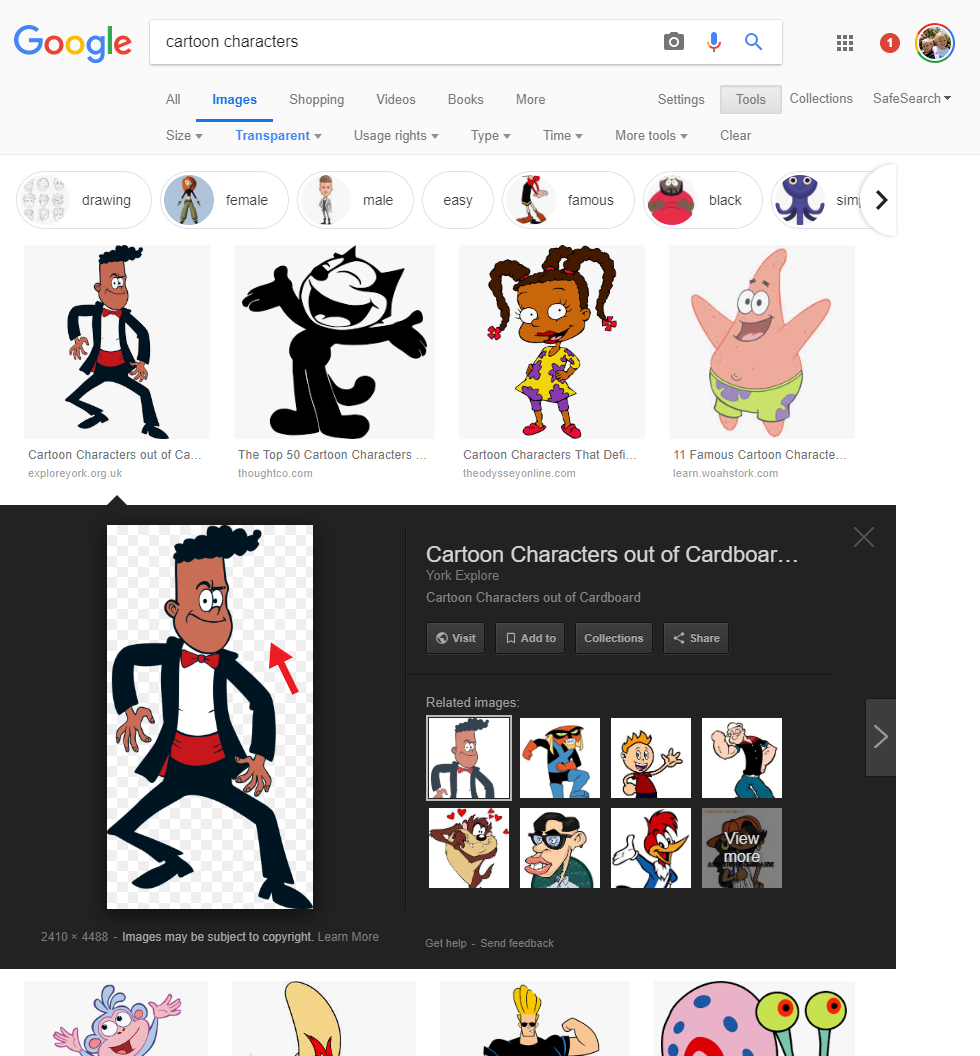
Open/Save the image
You want to save the full-size version of the image.
- Click on the image you like
- Look at the background behind the image, you should see tiny squares (that should mean it is transparent)
- Right-click on the image and choose Save image as
- Save the image into your img folder
- Name the image whatever you want, but add -original to the end of the filename
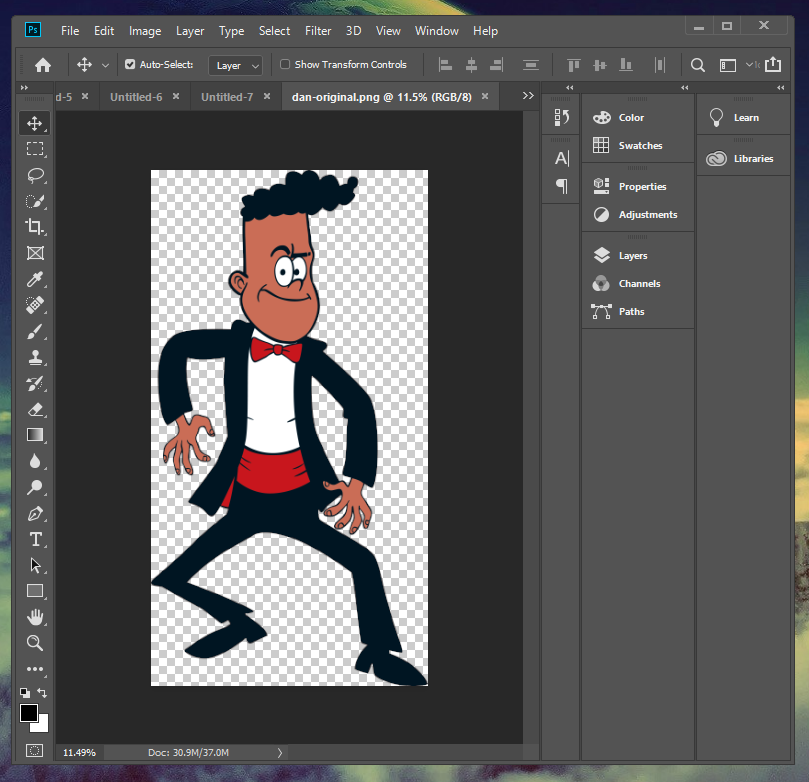
Open the image in Photoshop
- Open Photoshop
- In Photoshop, use File → Open
- Find the image you want to open
- Once the image is open, use Ctrl-0 or Ctrl-1 to see the image better
Trim the Image (remove extra space)
- Image → Trim
- Select Based on Transparent Pixels
- Click OK
Resize the image
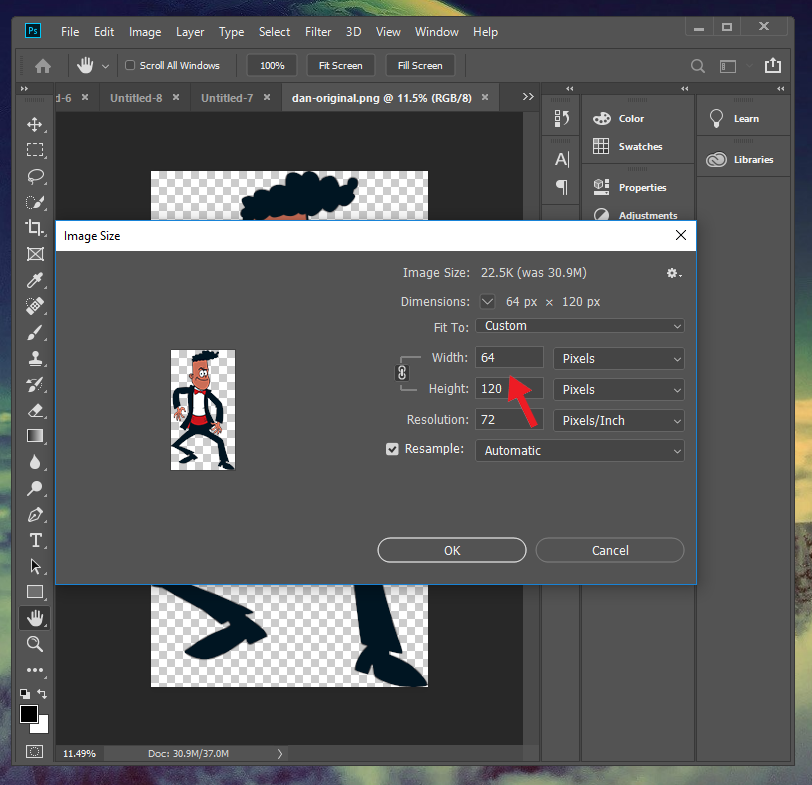
Browsers won't use a cursor if it is larger than 128px wide or tall.
- Use Image → Image Size
- Change the largest value between width and height to 128px or less
- Click OK
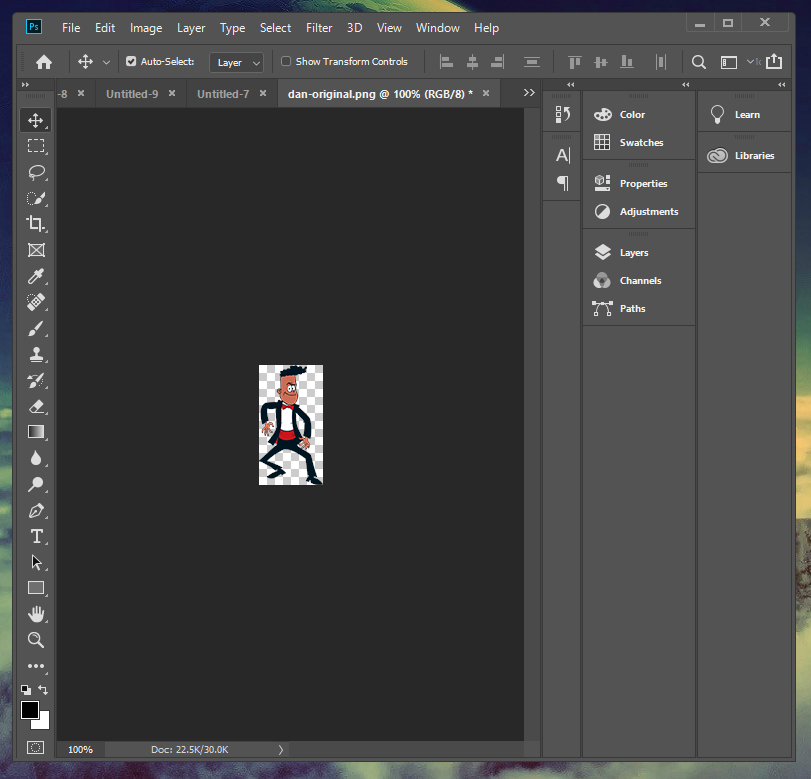
Use Ctrl-1 to see the new size of the image
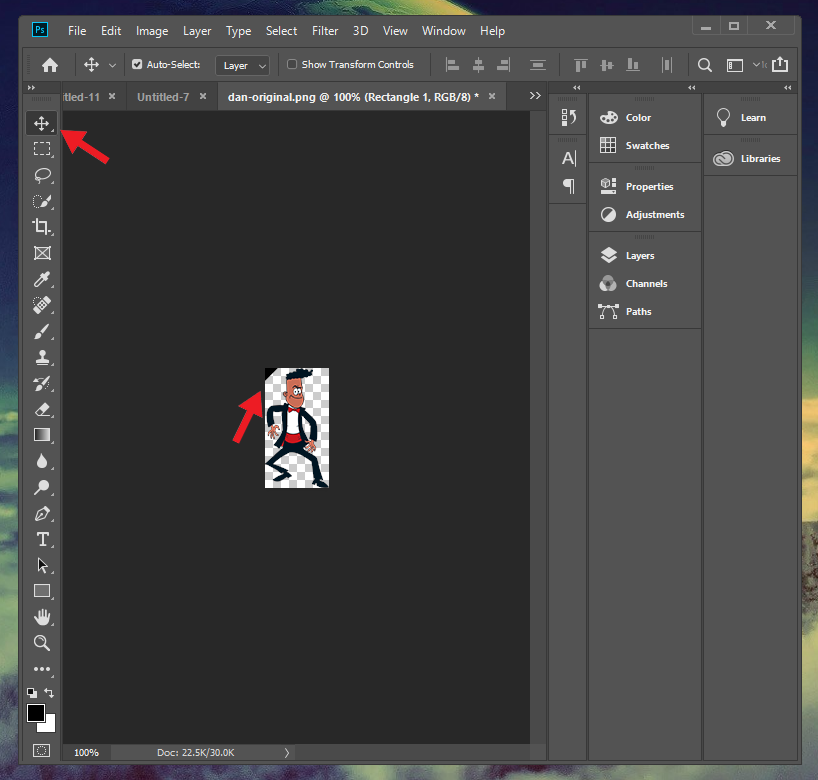
Create the top-left arrow
The top-left corner of the image is what you click with. If you don't have part of your image in that corner, you won't know where you are clicking.
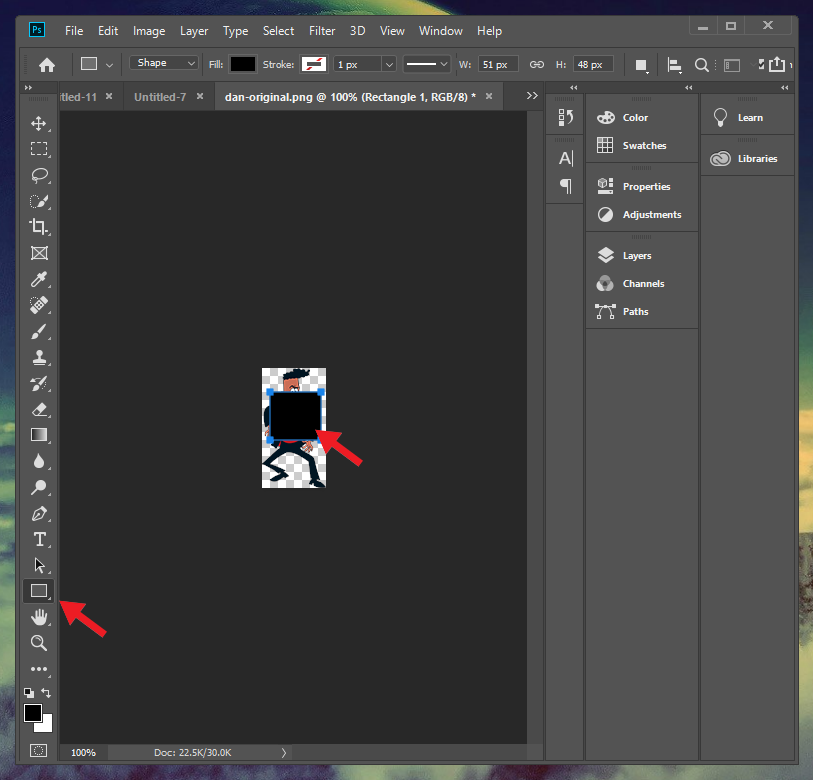
- Use the Rectangle Tool
- Create a rectangle (you usually want to use a black rectangle)
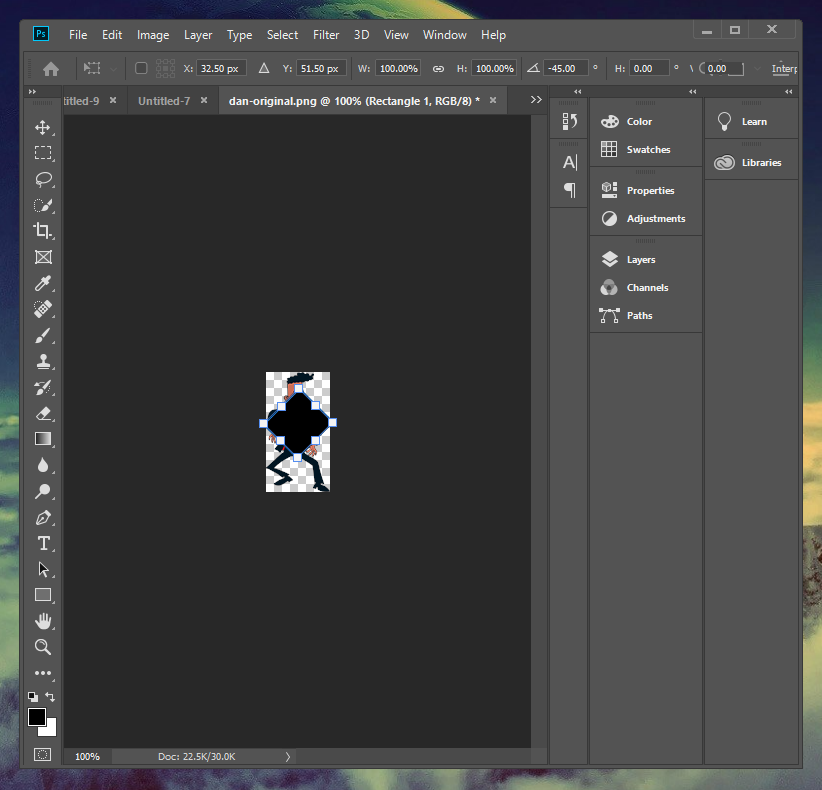
Next, you want to rotate the rectangle
- Use Ctrl-T
- Hold the shift key
- click and drag outside the rectangle until it looks like the image (45 degrees)
Finally, you want to move the rotated rectangle to the top-left corner like in the picture.
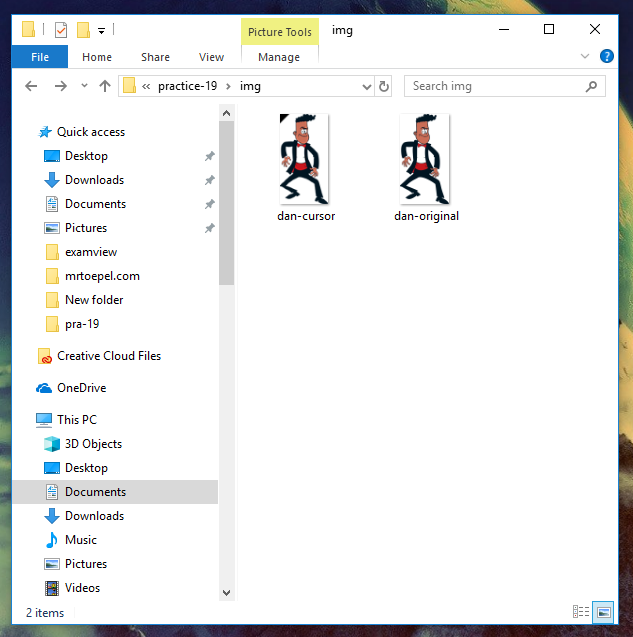
Save the cursor
Save the cursor into your img folder
- Use File → Save for the web
- Make sure you save the image as a PNG-24
- Add -cursor to the end of the filename
- You will now have two image files, the original and the cursor
